In summary:
- Success in home molecular gastronomy depends on precision and understanding the science, not just following recipes.
- Master basic hydrocolloids like agar-agar for gels and soy lecithin for foams before attempting more complex techniques.
- Safety is paramount; techniques like liquid nitrogen are unsuitable for home kitchens, but safer alternatives exist.
- True elevation comes from integrating new textures thoughtfully, considering flavour balance and visual presentation.
- Start with one technique, perfect it, and then learn how to incorporate it into a balanced, beautifully plated dessert.
The ambition of every passionate home baker is to create something that stops people in their tracks—a dessert that’s not just delicious, but memorable. You’ve mastered the classic sponge, the perfect buttercream, and now you’re looking for the next frontier. You see the incredible textures on cooking shows—glistening fruit caviars, impossibly light foams, and glass-like shards—and wonder, “Can I do that at home?” The world of molecular gastronomy seems to hold the key, a toolbox of scientific wizardry promising to transform the familiar into the extraordinary.
However, this world is also intimidating. The common advice often involves buying expensive kits or diving into complex spherification recipes that too often end in a bowl of inedible sludge. There’s a genuine fear of failure, of wasting time and expensive ingredients, or worse, of using powerful agents like liquid nitrogen improperly. This hesitation is what holds many ambitious bakers back from truly experimenting. It creates a gap between the desire for innovation and the confidence to execute it safely.
But what if the secret wasn’t about blindly following complex steps or using dangerous equipment? The real key, the approach used in professional development kitchens, is to stop seeing it as magic and start understanding it as a science of precision. It’s about mastering the “why” behind a technique, not just the “what.” The difference between a perfect gel and a rubbery blob is often a matter of a tenth of a gram or a few degrees of temperature. This guide is built on that principle of dosage discipline and risk mitigation.
We will break down the foundational techniques into manageable, safe applications for a home kitchen. We’ll start by mastering stable gels with agar-agar, understand why spherification attempts fail, and explain the non-negotiable reasons to avoid liquid nitrogen while exploring safer alternatives. We will then cover foam stabilization and advanced chocolate work before showing you how to think like a chef, integrating these new textures into a complete sensory experience through flavour balancing and high-end plating. This is your roadmap to safely and confidently elevating your baking from great to unforgettable.
This article provides a structured path, from mastering individual components to composing a final, show-stopping dessert. The following summary outlines the key techniques and principles you will learn to control.
Summary: A Chef’s Approach to Modernist Baking at Home
- How to Use Agar-Agar Successfully to Create Stable Fruit Caviars at Home
- The Incorrect Dosage Disaster That Turns Spherification Attempts Into Inedible Sludge
- Why Liquid Nitrogen is Too Dangerous for Standard Domestic Kitchen Environments?
- Which Stabilises Savoury Foams Best for Beginners Between Soy Lecithin and Xanthan Gum?
- How to Enhance Chocolate Textures Using Precise Temperature Manipulation
- How to Balance Flavour Profiles Across Successive Small Plates Without Overwhelming Palates
- How to Master the Negative Space Technique for Affordable Meat Cuts
- How to Elevate Budget Meals Using High-End Visual Culinary Presentation at Home
How to Use Agar-Agar Successfully to Create Stable Fruit Caviars at Home
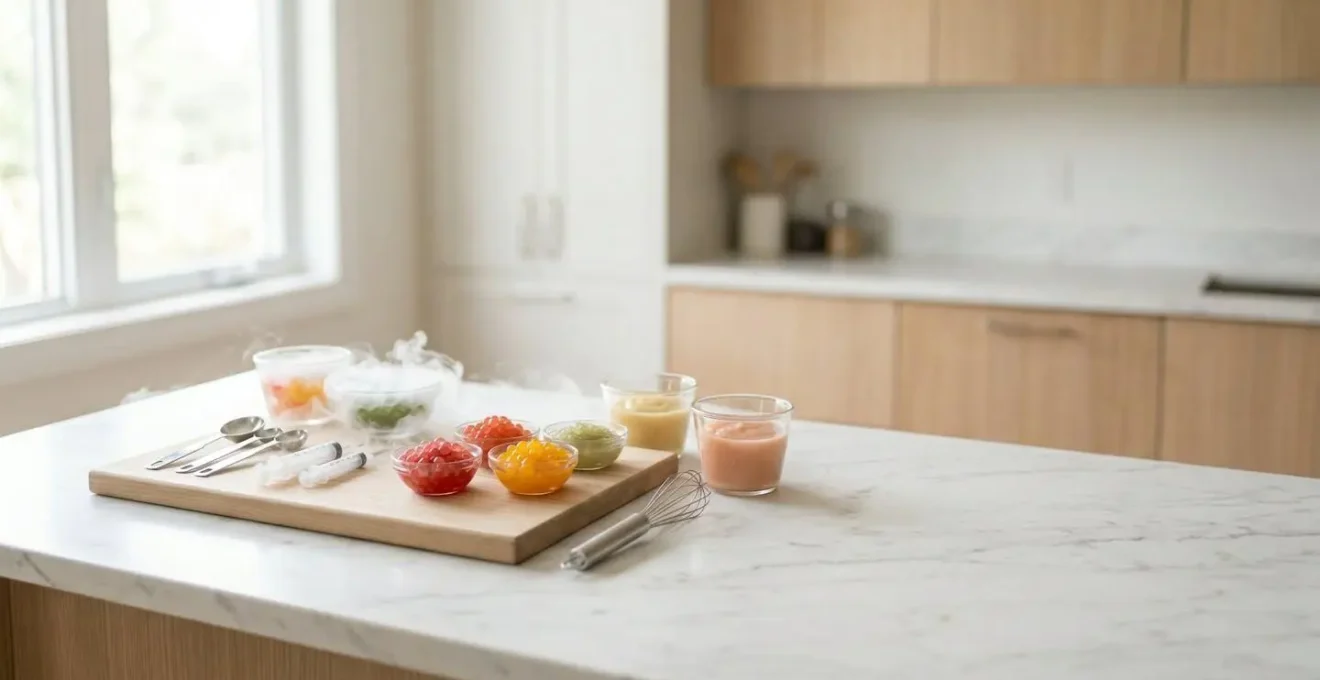
One of the most visually stunning yet accessible entry points into molecular gastronomy is creating fruit caviar. These tiny, glistening pearls deliver a burst of flavour and an elegant texture that can elevate anything from a simple cupcake to a panna cotta. The magic ingredient is agar-agar, a gelling agent derived from seaweed. Unlike gelatin, it’s vegan and sets firmly at room temperature, making it incredibly reliable once you understand how to activate it properly.
The success of agar-agar hinges on two things: correct hydration and precise thermal control. Agar must be dispersed in a cold liquid first and then brought to a boil (around 90-95°C or 194-203°F) for a minute or two to fully dissolve and activate its gelling power. Fail to reach this temperature, and you’ll get a weak, grainy set. The second key is creating a rapid temperature drop to form the pearl shape. This is achieved by dropping the hot agar mixture into very cold oil. The sudden shock causes the droplet to solidify into a perfect sphere as it sinks. It’s also important to note that fruits high in acidity like lemon or pineapple can interfere with agar’s gelling ability, so starting with less acidic juices like raspberry, mango, or blueberry is recommended for beginners.
This technique provides a perfect lesson in the precision required for modernist cooking. The ratio of agar to liquid, the activation temperature, and the temperature of the oil are all critical variables. Mastering them here builds the foundation for more complex hydrocolloid work.
To help you achieve a perfect result on your first try, the following action plan breaks down the process into clear, verifiable steps.
Action Plan: Creating Your First Batch of Fruit Caviar
- Prepare the Cold Bath: Pour vegetable oil into a tall glass and place it in the freezer for 30-40 minutes. The goal is for it to be extremely cold but still liquid.
- Activate the Agar: In a saucepan, combine your chosen fruit juice with the agar-agar powder. Bring the mixture to a gentle boil (90-95°C / 194-203°F) and hold it there for 1-2 minutes, whisking to ensure it’s fully dissolved.
- Control the Temperature: Let the agar mixture cool slightly for a few minutes. If it’s too hot, it may not form clean spheres; if it’s too cold, it will begin to set in the pan.
- Form the Pearls: Use a food-grade syringe or pipette to suck up the warm juice mixture. Carefully release it drop by drop into the chilled oil. You will see pearls form instantly and sink to the bottom.
- Harvest and Store: Once finished, pour the oil and pearls through a fine-mesh sieve. Gently rinse the pearls with cold water to remove any residual oil and store them in water until you’re ready to plate.
As you can see, the result is a professional-grade garnish that adds immense visual and textural appeal. These pearls are a testament to how controlling scientific principles leads to beautiful culinary outcomes. They can be prepared in advance, making them a perfect secret weapon for your weekend baking projects.
The Incorrect Dosage Disaster That Turns Spherification Attempts Into Inedible Sludge
Spherification is perhaps the most iconic technique of molecular gastronomy, famously used to create liquids encapsulated in a thin gel membrane. However, for every home cook who triumphantly creates a perfect liquid sphere, there are ten who end up with a disappointing bowl of cloudy, semi-solid sludge. The primary culprit is almost always the same: incorrect dosage. This technique relies on a precise chemical reaction between sodium alginate (mixed into your flavourful base) and a calcium chloride bath, and the ratios are not forgiving.
Too much sodium alginate results in a thick, viscous base that won’t form clean droplets. Too little, and the gel membrane will be too weak to form at all. Too much calcium in the bath can cause the reaction to happen too quickly, creating a solid, rubbery ball instead of a liquid-centred sphere. Furthermore, the pH and existing calcium content of your flavour base (like in dairy or certain fruits) can throw the entire reaction off balance. This is where many bakers, used to more forgiving recipes, get frustrated. It’s a lesson in humility and the necessity of a jeweler’s scale accurate to 0.01 grams.
For bakers looking to apply this concept, a much more reliable starting point is reverse spherification. In this method, the flavourful base contains the calcium (or has it added), and the bath is made with sodium alginate. This approach is far more versatile and forgiving. As noted by culinary experts, it offers a distinct advantage for beginners.
Reverse spherification is a more forgiving method for beginners, especially when working with calcium-rich or acidic bases common in baking like dairy or certain fruits.
– Pennsylvania College of Technology Culinary Department, Spherification & Reverse Spherification Technical Guide
By starting with reverse spherification, you can create spheres with yogurt, fruit purees, or cream-based liquids—items central to baking—without the dosage headaches of the basic method. It allows you to focus on the flavour and final application rather than fighting the chemistry, making it a smarter, safer way to bring this “wow” factor to your desserts.
Why Liquid Nitrogen is Too Dangerous for Standard Domestic Kitchen Environments?
The theatrical plume of white vapour from liquid nitrogen (LN2) is a staple of modernist cuisine, used to flash-freeze ingredients and create incredible textures like ultra-smooth ice cream or frozen powders. While the results are spectacular, this is one technique that absolutely must remain in the professional kitchen. The risks associated with handling LN2 at -196°C (-321°F) in a domestic setting are severe and multifaceted, making it a non-negotiable “do not attempt.”
The primary dangers are not always obvious. Beyond the immediate and severe cryogenic burns that can result from skin contact, the greatest risk in an enclosed space like a home kitchen is asphyxiation. When liquid nitrogen evaporates, it expands dramatically; safety guidelines for home cooks state that 1 liter of liquid nitrogen expands to 700 liters of nitrogen gas. This colourless, odourless gas displaces oxygen. In a poorly ventilated room, this can lower the oxygen level to a dangerous point, causing dizziness, fainting, or even death without any warning. Other risks include pressure explosions from sealing it in any container and the cryo-shattering of glass or plastic tools not designed for such extreme temperatures.
Fortunately, you can achieve similar “smoky” theatrical effects and rapid freezing safely using a much more accessible alternative: dry ice (solid carbon dioxide). At -78.5°C (-109.3°F), it is still extremely cold and requires protective gloves and proper ventilation, but it does not pose the same level of asphyxiation or explosive risk as LN2. Crushed dry ice can be mixed into liquids to create sorbets with a fine crystal structure or used under a plate to produce a beautiful, rolling fog for a show-stopping presentation. This is a prime example of risk mitigation: identifying a high-hazard technique and substituting it with a lower-risk alternative that achieves a similar aesthetic or textural goal.
Which Stabilises Savoury Foams Best for Beginners Between Soy Lecithin and Xanthan Gum?
Foams and “airs” are a fantastic way to introduce intense flavour in a weightless, intriguing texture. But creating a foam that doesn’t collapse into a sad puddle before it reaches the table is a common challenge. The choice of stabilizer is critical, and for beginners, the two most common options are soy lecithin and xanthan gum. While both create foams, they produce vastly different results and serve different purposes. The choice depends entirely on your desired outcome: an ephemeral, light “air” or a dense, creamy foam.
Soy lecithin is an emulsifier that excels at creating very light, delicate foams often called “airs.” It works by reducing the surface tension of the liquid, allowing it to incorporate a large amount of air. The resulting foam is made of large bubbles, has a “lacey” appearance, and melts in your mouth almost instantly. It’s perfect for a last-second garnish on a dessert, providing a burst of flavour without adding weight. However, its structural integrity is very low, and it will dissipate within minutes.
Xanthan gum, on the other hand, is a thickener. It increases the viscosity of the liquid, which helps to trap air bubbles and prevent them from escaping. This results in a much denser, creamier, and more stable foam that can hold its shape for an extended period. This makes it ideal for layering within a dessert, like a passionfruit foam in a trifle, or as a stable topping on a cupcake. You can even combine agents; research shows that using a protein with a hydrocolloid can dramatically increase stability. For instance, soy protein isolate with xanthan gum dispersion showed foam stability 9 times higher than egg white alone, demonstrating the power of synergistic combinations.
The following table, based on professional culinary analysis, breaks down the key differences to help you choose the right tool for the job.
| Property | Soy Lecithin | Xanthan Gum |
|---|---|---|
| Typical Ratio | 0.25% to 1.0% | 0.2% to 0.8% |
| Foam Texture | Light, airy ‘lacey’ foam – ephemeral | Dense, stable foam with creamy body |
| Longevity | Dissipates within a few minutes | Maintains structure for extended periods |
| Best Application | Delicate ‘airs’ for immediate plating | Layered foams in trifles or cupcakes |
| Mouthfeel | Melt-in-mouth lightness | Creamy, sauce-like texture |
For beginners, soy lecithin is often easier for creating a quick, impressive “air” with an immersion blender. However, for a foam that needs to last, xanthan gum provides the reliability and structural integrity you need. As this comparative analysis of culinary foams shows, understanding the properties of your stabilizer is the first step toward predictable, repeatable results.
How to Enhance Chocolate Textures Using Precise Temperature Manipulation
While not always categorized under the “molecular gastronomy” banner, the art of tempering chocolate is, at its heart, a perfect example of the discipline’s core principle: using precise thermal control to manipulate texture. Any baker can melt chocolate, but a modernist approach seeks to control its crystalline structure to create a specific sensory experience. The snap, shine, and smooth melt-in-the-mouth feel of professionally made chocolate aren’t accidents; they are the result of forming the correct type of fat crystals.
Chocolate contains cocoa butter, which can crystallize into six different forms. Only one, the Beta V crystal, gives chocolate its desirable properties: a glossy finish, a firm “snap” when broken, and a melting point just below body temperature. Tempering is the process of heating and cooling chocolate to specific temperatures to encourage the formation of these stable Beta V crystals while eliminating the others. Untempered chocolate will be dull, soft, and may have a grainy texture or white “bloom” on the surface.
The most reliable method for home bakers is “seeding.” This involves melting about two-thirds of your high-quality chocolate to around 45-50°C (113-122°F) for dark chocolate, then adding the remaining one-third of solid, unmelted chocolate (the “seed” crystals). This solid chocolate, which is already in the stable Beta V form, encourages the melted chocolate to crystallize correctly as it cools. You stir until the chocolate cools to the proper working temperature (around 31-32°C or 88-90°F for dark chocolate) and all the seed chocolate has melted.
This precise temperature manipulation allows you to create ultra-thin, brittle sheets of chocolate, hollow spheres, or glossy coatings that provide a textural contrast to soft cakes, mousses, or creams. It elevates a familiar ingredient by treating it not just as a flavour, but as a structural component that can be engineered for a specific effect. This mindset is the bridge between traditional baking and a modernist approach.
How to Balance Flavour Profiles Across Successive Small Plates Without Overwhelming Palates
You’ve done it. You’ve created a beautiful raspberry caviar, a light lemon air, and a perfectly tempered chocolate shard. The temptation is to put them all on one dessert. This is the most common mistake a baker makes when adopting modernist techniques: overwhelming the palate. In professional kitchens, this is managed through the concept of sensory architecture. It’s not just about what’s on the plate, but how the flavours and textures are sequenced and balanced.
When you introduce a powerful new texture or a concentrated flavour, it must serve a purpose. Ask yourself: does this foam enhance the main component, or does it distract from it? Is this gel a pleasant surprise or a textural clash? The goal is to create harmony, not a competition. A good rule of thumb is the “plus one” principle. Take a classic dessert you already make—for example, a simple chocolate lava cake with a raspberry coulis—and elevate it with just *one* modernist element. Perhaps you turn the coulis into a warm raspberry foam to add lightness, or you top it with a few mint caviar pearls for a surprising burst of freshness.
Another key is to balance intensity. If you have a very rich, intense element like a dark chocolate crémeux, pair it with something light and acidic, like a passionfruit “air” or a citrus gel. The contrast cleanses the palate and makes each bite more interesting. Avoid layering multiple rich or multiple acidic elements together. Think of it as composing a piece of music: you need quiet moments to make the loud moments impactful. A dessert with five different, powerful modernist textures is often less enjoyable than a simple, perfectly executed dessert with one surprising and thoughtful element.
This restraint is the mark of a confident creator. It shows you understand not just how to make these elements, but *why* and *when* to use them. By focusing on balance and integration, you ensure your new skills elevate your baking rather than complicate it.
Key takeaways
- Molecular gastronomy at home is about precision and safety, not just spectacle. Focus on understanding the ‘why’ behind each technique.
- Start with accessible techniques like agar-agar gels and soy lecithin foams before tackling more complex methods like spherification.
- Visual presentation is a technique in itself. Use principles like negative space and thoughtful composition to make simple dishes look high-end.
How to Master the Negative Space Technique for Affordable Meat Cuts
This title may seem out of place in a baking guide, but the underlying principle is one of the most powerful tools in a modernist chef’s arsenal and applies perfectly to desserts. The concept is about visual presentation. In this context, “affordable meat cuts” is a metaphor for your “basic” or “humble” baked goods—a simple brownie, a scoop of vanilla ice cream, a slice of pound cake. The technique of negative space is about using the empty area on the plate to make that simple item look deliberate, elegant, and expensive.
Traditional plating often involves filling the plate. Modernist plating, however, treats the plate as a canvas and the empty space as a crucial design element. By placing your brownie off-centre, you immediately create visual tension and draw the eye to it. A single, perfect quenelle of ice cream in a large, empty bowl feels more special and intentional than three scoops crowded together. The negative space gives the main element room to breathe and elevates its perceived value.
To master this, follow a few simple rules. First, use larger plates than you think you need. A small dessert on a large white plate instantly looks more refined. Second, embrace asymmetry. Instead of placing everything in the middle, arrange your components along a curve or a straight line off to one side. Third, use sauces and garnishes to guide the eye. A single, clean swipe of sauce or a delicate sprinkle of “dust” (like powdered freeze-dried raspberry) can connect disparate elements and create a sense of motion across the empty space of the plate.
This technique costs nothing but transforms everything. It forces the person eating to focus on the textures and flavours you’ve so carefully crafted. By learning to plate your simple, “affordable” brownie with the same respect a chef would give a high-end ingredient, you are applying the final and perhaps most impactful modernist technique of all: controlling the experience before the first bite is even taken.
How to Elevate Budget Meals Using High-End Visual Culinary Presentation at Home
We’ve journeyed through the science of textures and the philosophy of balance. The final step is to bring it all together in the composition—the visual presentation that creates the first impression and sets the expectation for the experience to come. Elevating your baking with high-end presentation isn’t about adding more; it’s about being more deliberate. It’s about taking all the components—the cake, the sauce, the textural garnish—and arranging them with the principles of sensory architecture in mind.
Think about building in layers, not just of flavour, but of height and texture. Instead of a flat slice of cake, perhaps you cut it into smaller, interesting shapes. Instead of a pool of sauce, you use a precise squeeze bottle to create a delicate pattern of dots or a sharp, clean swipe across the plate. Your fruit caviar, once mastered, isn’t just sprinkled on top; it’s placed in a small, concentrated cluster where its jewel-like appearance can be most appreciated.
Composition is a game of contrasts. Contrast colours (a dark chocolate element against a vibrant red fruit sauce), shapes (a round scoop of ice cream next to a sharp, angular chocolate shard), and textures (a soft mousse with a crunchy crumble and glistening gel pearls). Each element should be distinct and have its own space, as we discussed with the negative space technique. The goal is a plate that looks clean, organized, and intentional, inviting the diner to explore its different parts.
Ultimately, presentation is storytelling. A rustic, “home-style” dessert tells a story of comfort and abundance. A modern, precisely plated dessert tells a story of elegance, creativity, and craftsmanship. By applying these high-end visual techniques, you are communicating the care and skill that went into your baking. You are signalling that what you’ve made is not just a “budget meal” or a “simple dessert,” but a thoughtful and complete culinary creation. This is the final touch that transforms your advanced weekend baking into a truly show-stopping experience.
Begin today by choosing one simple technique, like the agar-agar fruit caviar, and focus on mastering the precision it requires. By applying these principles of science, safety, and sensory architecture, you can begin transforming your baking results immediately.